
If you run a WordPress website where you intend on adding eCommerce functionality at one stage or another, you cannot go past the free Stripe Payment Plugin. This plugin is designed to allow admin to sell either digital or tangible goods from their website through simple Stripe ‘Buy Now’ buttons. Just like PayPal, Stripe is a trusted payment processor that many merchants use to handle the transaction process on their website.
While the Stripe Payments Plugin allows you to use a shortcode that creates an aesthetically pleasing ‘Buy Now’ button, for some websites, it makes sense to use a text link payment button. Using a payment button link allows you to use any text or image as the anchor meaning you are not restricted to using the default button provided by the plugin.
What is a Text Link Payment Button?
If you are relatively new to the eCommerce world, you may not have heard of the term ‘Text Link Payment Button‘. Without you even realizing, you may have even checked out on a website before using one.
A payment button is either textual or graphical, with graphical buttons appearing more often due to their somewhat aesthetically appealing nature. While graphical buttons are sighted more often on the web, this does not always mean they are the right fit or practical for a website. Many times a text link payment button may be a better choice. A link style payment button can even be anchored to an image if it is a better fit for the website compared to the default ‘Buy Now’ button.
If you are using a plugin, you may find the default payment button they offer does not fit with the aesthetics or feel of your website, and in these cases, a text link payment button may work out better. Before you decide on which plugin you will use to handle transactions on your WordPress website, consider what payment button styles are on offer, and if you have little to no developer knowledge choosing a plugin that allows for text link payment buttons will ensure you can design up any type of payment button you like.

What is the Stripe Payments Plugin and Why May it Be Suitable for my Website?
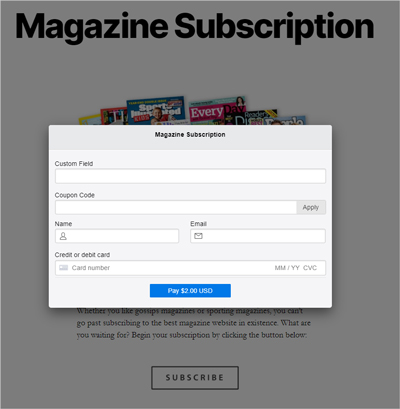
The Stripe Payments Plugin is Tips and Tricks HQ’s free, Stripe eCommerce solution for WordPress websites. It allows merchants to sell both digital and tangible goods from their website to their customers via simple ‘Buy Now’ buttons. Once a customer clicks a payment button, the Stripe popup window appears where they can complete the full transaction for the product or service they wish to purchase.
The Stripe Payments Plugin is suitable for many merchants although those in particular that want/need the following features within their eCommerce software:
- The ability to use ‘Product Link URL’s’ to create custom payment buttons (either text buttons or visual buttons)
- Option to sell both tangible and digital items
- Integrations that allow for subscription products, local payment methods, and email marketing
- Ability to have donation or custom amount products
- Option to create discount coupons that can be used on all or specific products
- Terms and condition checkboxes
- Ability to set a thank you page on a per-product basis
- Option to have product variations and collect input from customers on the checkout
Creating a Text Link Payment Button
Video Tutorial: Using the Stripe Payments Plugin to Create Custom Text Link Buttons
Written Tutorial: Using the Stripe Payments Plugin to Create Custom Text Link Buttons
If you are using WordPress, you have landed on the perfect blog to help you start creating text link payment buttons that you can add to your website to start selling goods or services.
In this tutorial, we will be using the Stripe Payments Plugin by Tips and Tricks HQ to achieve text link payment buttons although a similar approach can be taken when using another plugin that offers product link URL’s.
When a customer clicks any of these buttons (text links) the Stripe checkout window pops up where the entire transaction can be completed. The customer’s order is then recorded in the WordPress dashboard and Stripe transacts the funds from the customer to the merchant.
1) Set Up the Plugin and Create a Product
- Ensure you install and activate the Stripe Payments Plugin on your WordPress website. This plugin can be activated directly from your WordPress dashboard’s ‘Plugins‘ menu.
- Complete the required set up of the plugin and then create your first product or service from the Stripe Payments ‘Products‘ menu. For detailed information on creating a product with this plugin click here.
- Publish out your product by clicking on the ‘Publish‘ button.
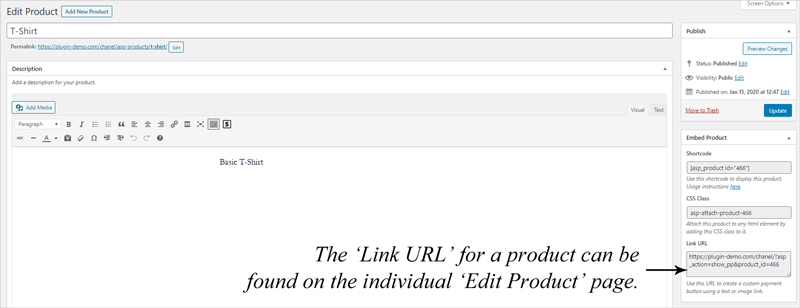
- Right below the ‘Publish‘ button, you will notice a section titled ‘Embed Product‘.
- Within the ‘Link URL‘ field, you will be able to copy a payment button link for this product.
2) Attach the Product Link to Text or an Image
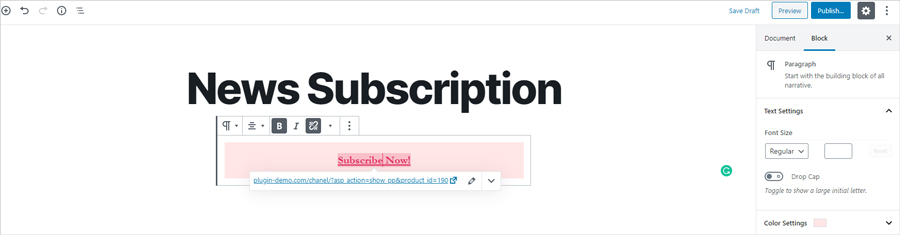
- Locate the text or image you wish to make a payment button. The text/image can be within a WP page or post, a widget or within a pricing table. Ensure you have the ‘Link URL‘ of the product in question copied, and add it to the text/image just like you would add any internal/external link.
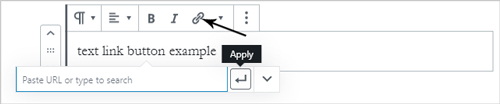
This can be achieved by:
– Highlighting the text you wish to add the link to.
– Clicking the ‘Link’ icon.
– Pasting the link and clicking ‘Apply’. - ‘Update‘ the page or post or ‘Save‘ the widget.
- You have now successfully made your text (or custom image) into a payment button. When a customer clicks on the text link, the Stripe Payment popup window will appear where they can complete a checkout for an item or service you have for sale on your website.
Payment Buttons vs Text Links: When Should I Use a Text Link Payment Button?
There is no right and wrong when it comes to the type of button you use for your website. While there is some evidence that certain colors and graphics draw the attention of prospective buyers, at the end of the day, you need to choose the right payment buttons for your website.
eCommerce experts advise that your call to action button which in this case is your payment button is clear and concise. This means if you are using text instead of a visual button, make sure that the text clearly indicates that if the customer was to click on it, the checkout window will appear. The placement of the text link is important but the color of the link should also be considered. Some words/phrases you may use as the button anchor include although are not limited to:
- Purchase Product Now
- Buy Now
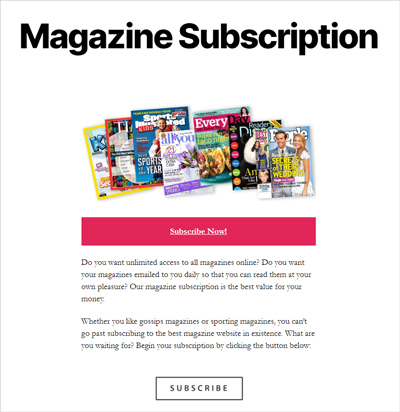
- Subscribe Now
- Don’t Wait, Subscribe Now
- Checkout Now
- Get Your Copy
- Purchase Digital Content
Using a text link payment button makes sense if you are using a third-party plugin or theme that does not allow a normal shortcode to be implemented. Take ‘Pricing Tables’ for example. Many ‘Pricing Tables’ will allow you to add a link to text you add, although not a shortcode, so using the Stripe Payments Plugin’s text link payment button feature allows you to easily still achieve a call-to-action button within the neat and formated table you have created.
1) The Options are Endless with a Text Link Payment Button
Rather than attempting to apply CSS tweaks to a plugin’s default payment button, using a text link payment button allows you to hook the button to any text or image you wish to use as the ‘Buy Now’ button. This means that even those with little to no developer knowledge can set up an aesthetically pleasing blog or shop page with custom payment buttons. eCommerce plugins that come with built-in text link payment buttons ensure that you can have payment buttons that are the right fit for your website.
2) Text Link Payment Buttons Can be Used in Pricing Tables
If you are using a pricing table plugin, or your theme comes with built-in pricing tables, you may have hit a standstill as many of these tables do not allow shortcodes to be implemented. The workaround to adding a payment button into your table is using a text link payment button. While adding a shortcode is not always a possibility, adding a text link often is.
3) Text Link Payment Buttons Can be Added to Widgets
As long as a link can be added to the widget text, you’ll be able to add your product link URL. This allows you to have buttons on the sidebar of any website.
Can I Create a Text Link Subscription Payment Button?
If you use the Stripe Payments Plugin to handle eCommerce transactions, you can use the product link URL for both subscription and one-time payment products. This means you can create a custom button for your subscription products just like you can for your one-time payment products. The exact same easy approach can be taken whereby you copy the product’s ‘Link URL‘ and attach it to an image or text within a WordPress post, page or widget.
To create and offer subscription-style products with the Stripe Payments Plugin, you will also need the Stripe Subscription Payments Addon. This addon gives you the ability to offer subscription products and services.
Interested in using the Stripe Payments Plugin to sell goods and services from your WordPress website? Click here to find out more and download the latest version of this free plugin.
The post How to Make a Stripe Text Link Payment Button appeared first on Tips and Tricks HQ.
from Tips and Tricks HQ https://ift.tt/2Ud8cke
via IFTTT

No comments:
Post a Comment