Quizzes are a fun way to increase user engagement on your site. You can use them for educational purposes or use them to create viral content like BuzzFeed and others to get more social shares.
Quizzes are basically online forms that collect user input, calculate responses, and show results.
In this article, we will show you how to easily create a quiz in WordPress.

Why Add Quizzes to Your WordPress Site?
Quizzes are fun and highly engaging. Due to their interactive nature, users find them more rewarding than other types of forms.

Marketers have been using quizzes to generate leads since the very early days of the internet.
There are many scenarios where quizzes can help you capture audience interest, gather data, and add interactive features to your site.
- Viral quizzes can help you gain more traffic from social media. BuzzFeed is probably the most popular example of viral quizzes
- Educational quizzes to accompany your online courses
- Quizzes to asses customer needs and recommend them solutions.
- Quizzes that require users to sign up for your email newsletter
- and more…

Having said that let’s go ahead and see how to create easily create a quiz in WordPress.
Creating a WordPress Quiz with Formidable Forms
As the saying goes, there’s likely a plugin for that. You can find many WordPress plugins for making a quiz, but it’s always your responsibility to choose the best one.
For creating this tutorial, we tried out the best WordPress quiz plugins available and picked Formidable Forms plugin as the best WordPress-focused solution.
Formidable Forms is the most advanced WordPress form plugin available on the market. It comes with a simple but powerful drag and drop form builder which helps you go beyond just contact forms.
Using its powerful interface, you can easily create advanced forms like quizzes, surveys, calculators, registration forms, and more.
Formidable Forms plugin comes with a Quiz Maker add-on for creating quizzes in WordPress. It allows you to easily build quizzes and display them on your website.
Let’s take a look at how to do that, step by step.
Step 1: Install the Formidable Forms and Quiz Maker Addon
First thing you need to do is install and activate the Formidable Forms plugin. For creating a quiz, you will need to purchase at least their ‘Business’ plan which includes the Quiz Maker addon.
For detailed instructions, check out our step by step guide on how to install a plugin in WordPress.
Next, you will need to install the Quiz Maker addon. Go to Formidable » Add-Ons, navigate to Quiz Maker addon and click the Install button.
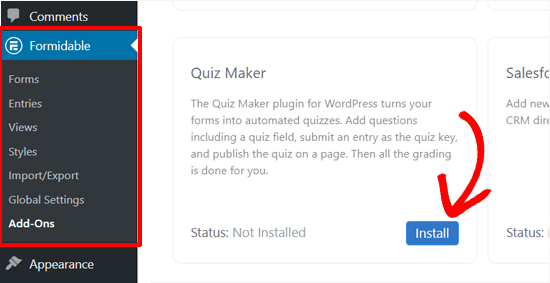
It will install the addon in a few seconds and show the addon as ‘Active.’
That’s it!
Now, you are all set to start building a quiz using Formidable Forms.
Step 2: Create a WordPress Quiz with Formidable Quiz Maker
Now that you’ve installed the Formidable Forms Quiz Maker, you are ready to create your first WordPress quiz.
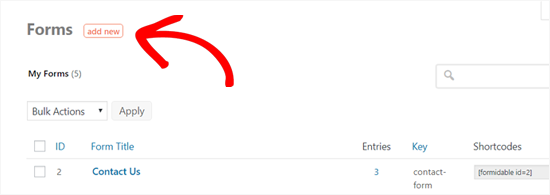
Navigate to Formidable » Forms from your WordPress dashboard and click the ‘Add New’ button.
Next, you will see different ways to create a form with Formidable Forms. You can either start with a blank form, use a form template, or import from an XML file. In our guide, we will show you how to start with a blank form.
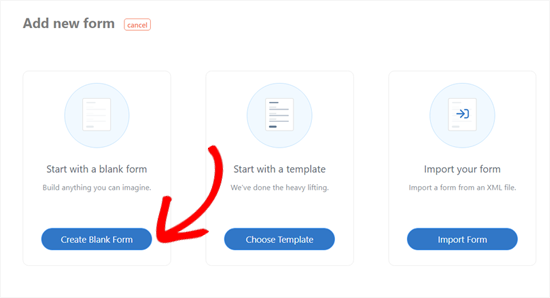
Start by clicking on the ‘Create with a blank form’ button. Next, you will see the plugin’s form building interface.
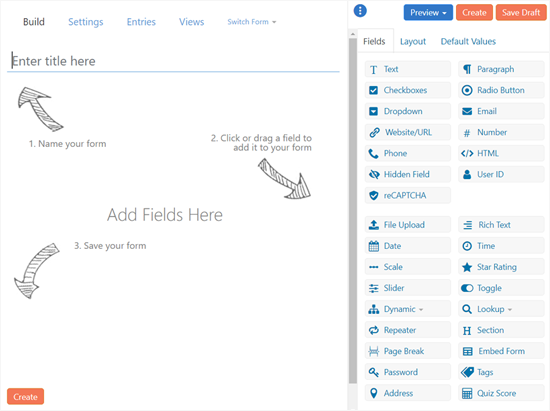
As shown in the screenshot above, you will see the main 3 steps to create a form. First, name your quiz. Second, add fields to your form. And third, save your form.
Quizzes can be used for different purposes including satisfaction test, personality quiz, market research, knowledge test, etc.
You may need different types of fields based on your quiz type. We recommend having a list of your questions and answers ready before creating the quiz.
In this guide, we will show you how to create a simple WordPress knowledge test quiz which includes different fields including single response ‘Text’ field as well as multi-response ‘Dropdown’ and ‘Radio Buttons.’
Let’s get started with the name of your quiz form. Then, you can add fields to your form by simply clicking or dragging the fields on the right.
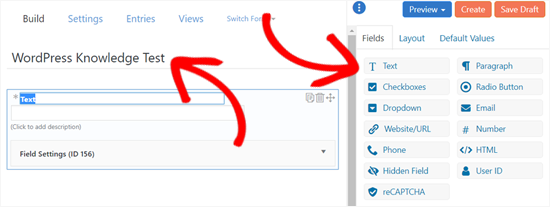
Here, we added a ‘Text’ field for the first quiz question and replaced the field title with the question.
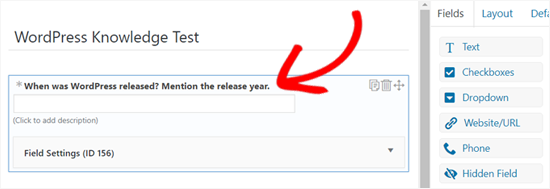
Next, we added a ‘Dropdown’ Field for a multi-response question.
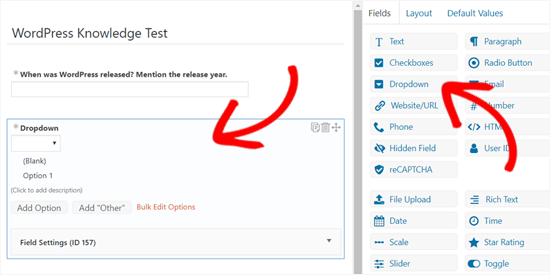
Replace the field title with your question first. Then, add options for your question.
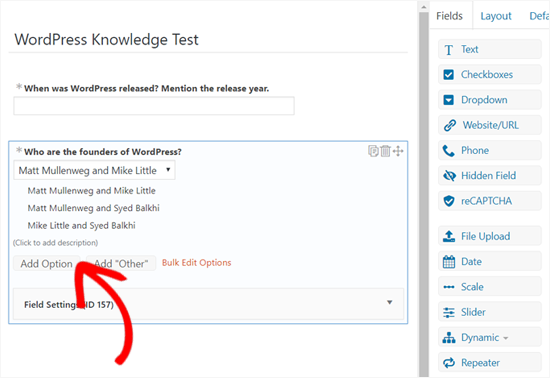
Similarly, you can add more questions to your form. Once done, add the ‘Quiz Score’ field to your form.
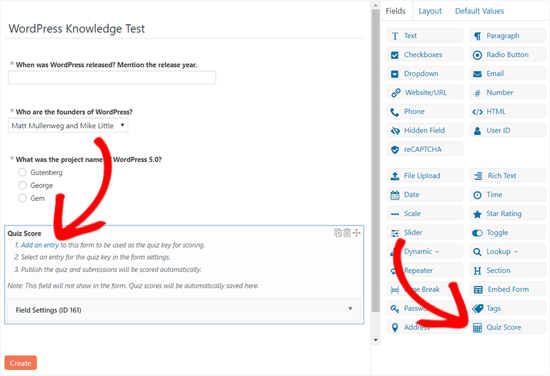
The Quiz score field is important because it’s where you can enter the correct answers for your quiz questions. Simply right-click the ‘Add an entry’ link to open in a new tab.
Doing so will open the ‘Entries’ page in a new tab.
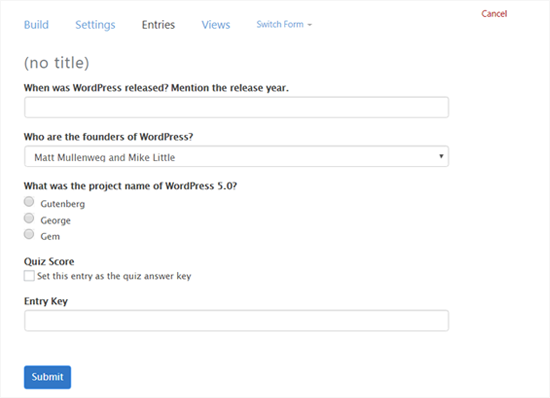
Now, you can enter or choose correct answers for your quiz questions. The plugin will later evaluate the users’ entries based on your entries here.
Once done, put a check on the box next to ‘Set this entry as the quiz answer key.’ After that enter a descriptive name in the ‘Entry Key’ field and click the ‘Submit’ button.
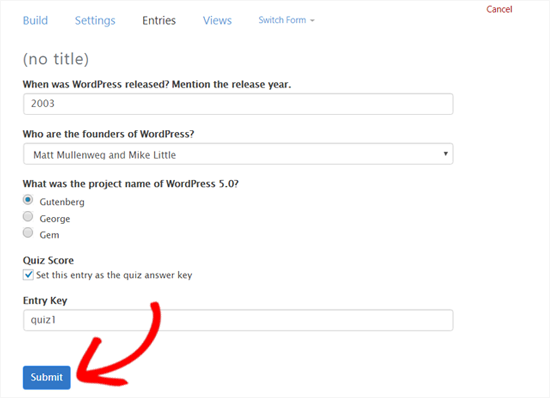
Once your entries are saved, you can close the tab and go back to the form making page.
Next, you need to click the ‘Create’ button.
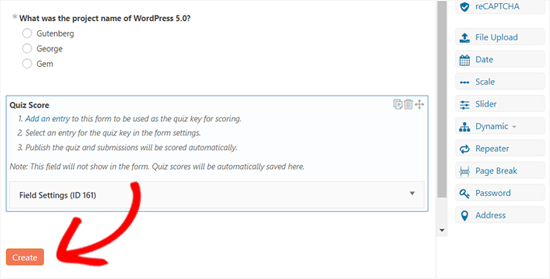
Upon clicking the Create button, it will open the form General Settings. On this page, you can set up settings for your form including what to display when a user completes your form.
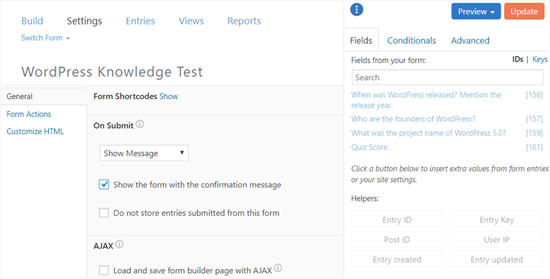
You can review all the settings and then change them or simply leave them as default.
Then, scroll down to the Messages section to customize the message users will get when they complete your quiz.
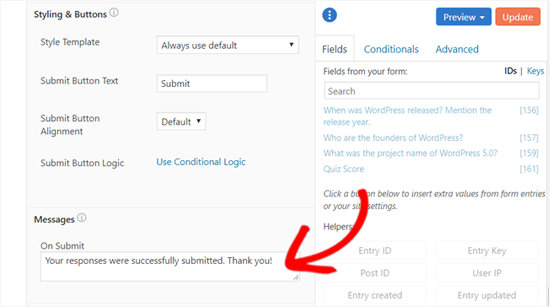
If you want to show the quiz score immediately to your users along with this message, you can add a shortcode including your Quiz Score field key or field ID.
You can find your Quiz Score field ID or the key under the ‘Fields’ panel on the right.
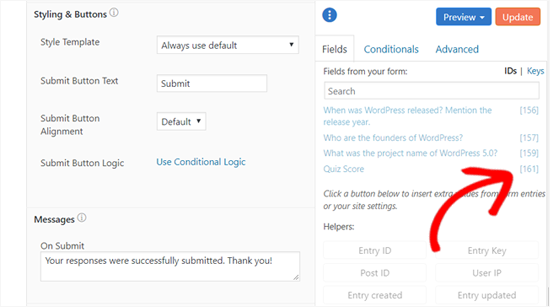
As you can see on the screenshot, the Quiz Score field ID in this example is [161]. Now, you can add a shortcode to the message box including this ID or key in the following format:
[161] – For fraction correct. Example: 5/10.
[161 show=count] – For correct answer count. Example: 5.
[161 show=percent] – For percent count. Example: 50%
[161 show=grade] – For letter grade. Example: F.
Here’s how you can add the shortcode to the message box.
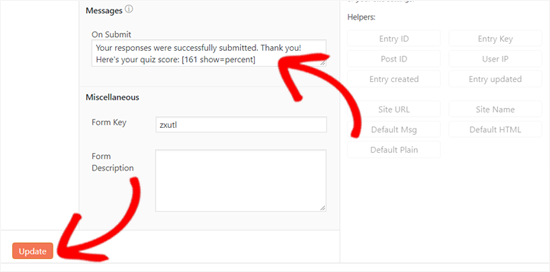
Once you are done, click the ‘Update’ button at the end. That’s all. You’ve created your first quiz.
Step 3: Adding Your Quiz to Your WordPress Site
Now that you have successfully created a quiz form, you are all set to display it on your site. You can add the quiz to your site easily using the Formidable Forms widget.
In this tutorial, we will show you how to add that on a page.
Go to Pages » Add New from your dashboard.
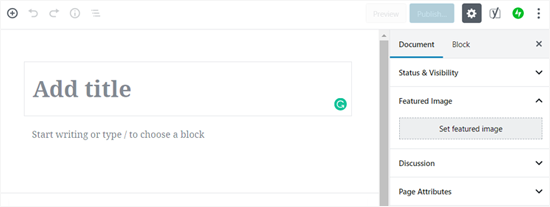
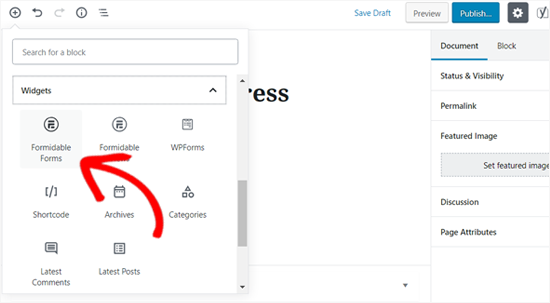
First, you will need to add a title and then click the ‘Add Block’ icon to add the Formidable Forms widget. Under the Widgets tab, you need to click the ‘Formidable Forms’ widget.
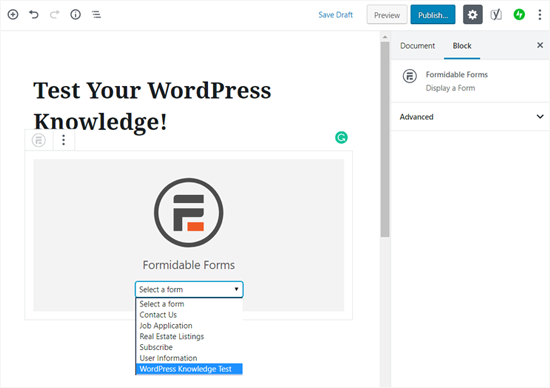
After that it will add the Formidable Forms block to your page area. Simply click the dropdown in the block and select your quiz form.
Your quiz will now load on your page.
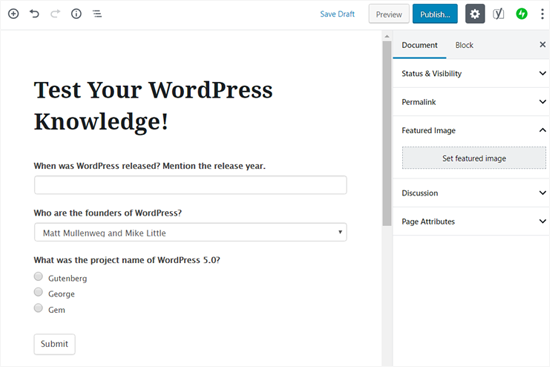
Now you can go ahead and publish your page.
That’s it! Your WordPress quiz is live and your users can start answering questions.
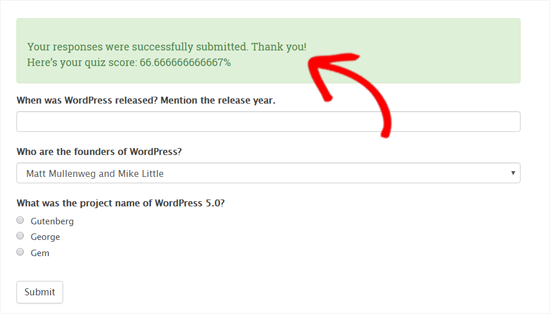
Here’s how users will see the quiz results after clicking the submit quiz button.
We hope this article helped you add a quiz to your WordPress site. You may also want to see our guide on how to add a client feedback form in WordPress.
If you liked this article, then please subscribe to our YouTube Channel for WordPress video tutorials. You can also find us on Twitter and Facebook.
The post How to Easily Create a Quiz in WordPress appeared first on WPBeginner.
from WPBeginner https://ift.tt/2SvOP17
via IFTTT
No comments:
Post a Comment