Do you want to add captions to your images in WordPress? Captions are brief text descriptions that you can add to your images. They are typically used to provide additional details about an image.
WordPress comes with the built-in capability to easily add a caption and other metadata including title and alternative text for each image.
In this beginner’s guide, we will show you how to easily add a caption to images in WordPress.

Adding Caption to Images in WordPress
The first thing you need to do is to upload an image. On the post edit screen, click the ‘Add Block’ icon and select the ‘Image’ block.
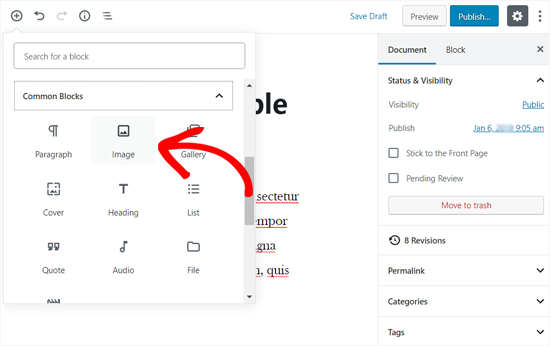
Upon clicking on it, the Image block will be added to your post area.
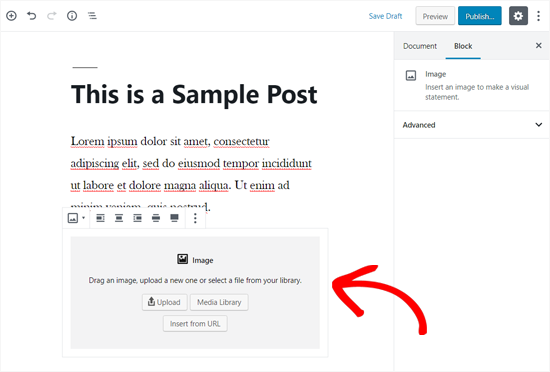
You can now click on the upload button to select and upload an image from your computer to WordPress. You can also select a previously uploaded image by clicking on the media library button.
To learn more, see our article on how to add and align images in WordPress.
As soon as you add an image, it will appear inside the editor with a text box labeled ‘Write caption…’ below it.
That’s where you can add a caption for your image.
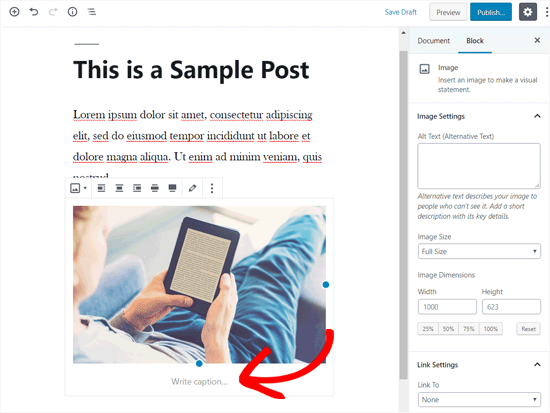
Once done, you can save your post by clicking on the publish or update button.
That’s all. Wasn’t that easy?
Add Captions to Your Gallery Images
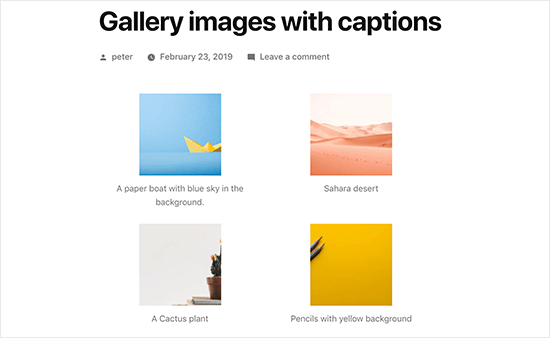
WordPress editor also comes with a Gallery block allowing you to upload multiple images and display them in a grid layout with rows and columns.
Let’s see how to add captions to images in a WordPress gallery block.
To create a gallery, go to your page or post edit screen. Then click the ‘Add Block’ icon and select the ‘Gallery’ block in the Common Blocks tab.
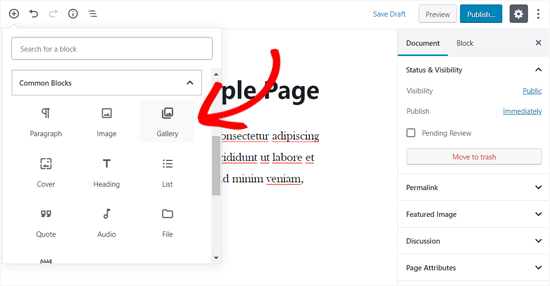
Next, you will see the Gallery block added to your page/post area. Now, you can upload images one by one from your computer or select the pre-uploaded pictures from your media library.
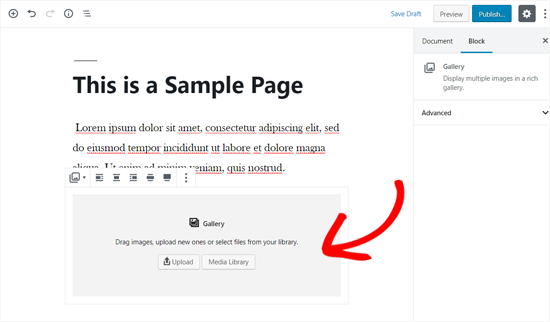
If you upload images individually, then you can add a caption after uploading each one. When an image is uploaded, simply click on the image and the ‘Write caption…’ field will appear. You can add a caption by clicking on that.
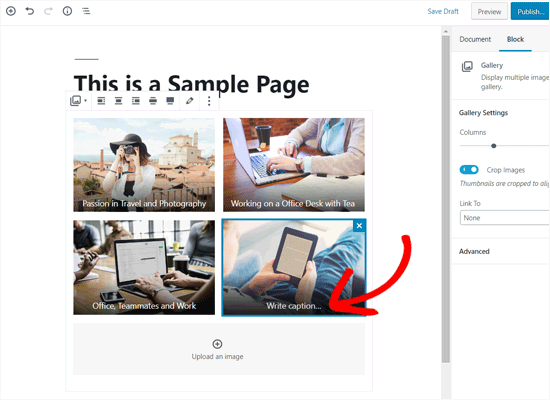
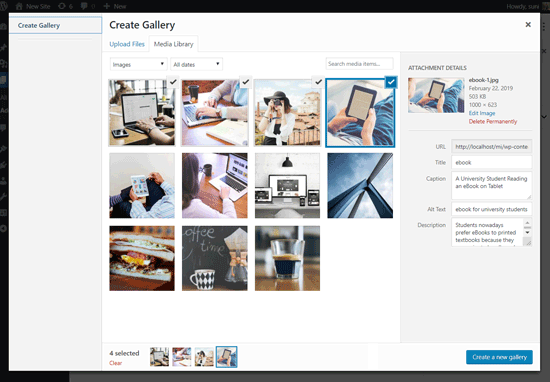
If you select pre-added images from the library, you can add a caption to your pictures from the image metadata section on the right. If the photos already have a caption, then you don’t need to add it again.
Adding Captions to Images in WordPress Media Library
WordPress allows you to upload images directly to the media library without embedding it in a post or page.
Here we will show you how to add caption to images when uploading them directly to the Media Library.
First, you need to visit Media » Add New page in WordPress admin area.
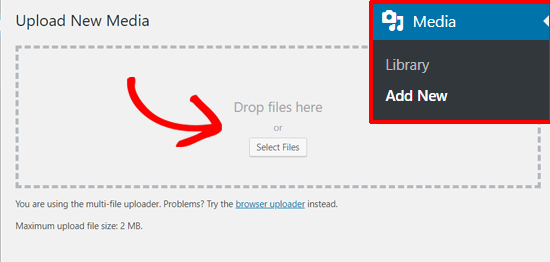
From here, you can upload an image by dragging and dropping or by selecting one from your computer.
Once done, you will see the uploaded image below the Upload New Media box. You need to click the ‘Edit’ link.
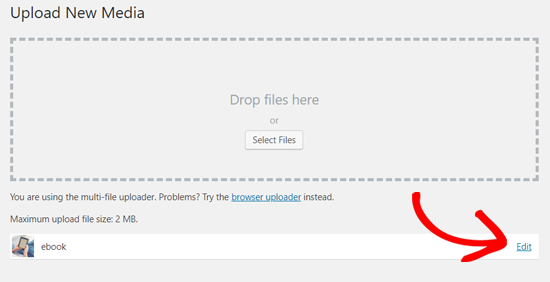
Next, it’ll open the edit media page in a new tab. You may notice that the edit media screen looks similar to the post edit screen. That’s because WordPress treats attachment (for example, image) as a default post type.
This allows it to store image metadata like title, description, and caption in WordPress database.
From this screen, you can edit your image title, add image metadata including caption, alternative text, and description.
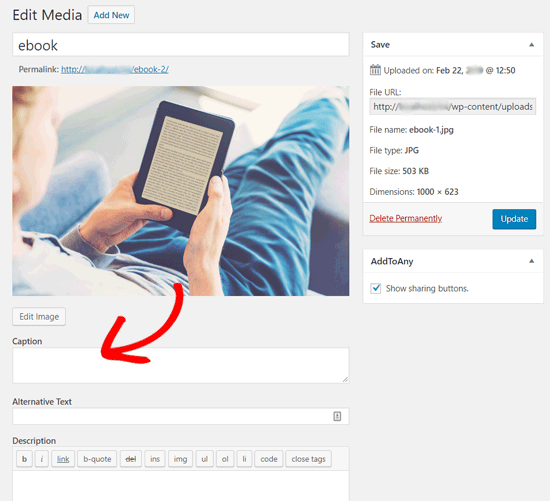
Once you add the necessary information, you can update your image. This image metadata will now be saved in your media library.
You can add this image on as many posts as you like without having to add the caption and other metadata again. Whenever you add this image to your post from the media library, it comes with the metadata already saved.
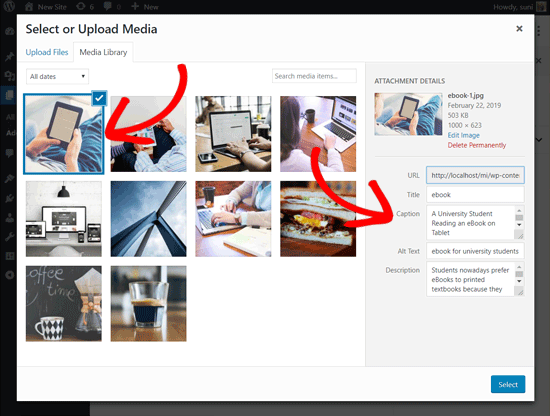
Adding Caption to Images in WordPress with Old Classic Editor
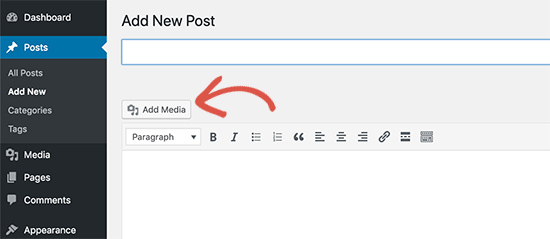
If you are still using the old Classic Editor on your WordPress site, then this is how you would add captions to images in WordPress.
Simply click on the Add Media button above the post editor to upload an image or select one from the media library.
Once the image is uploaded you can enter meta data like title, alt text, and a caption of your image.
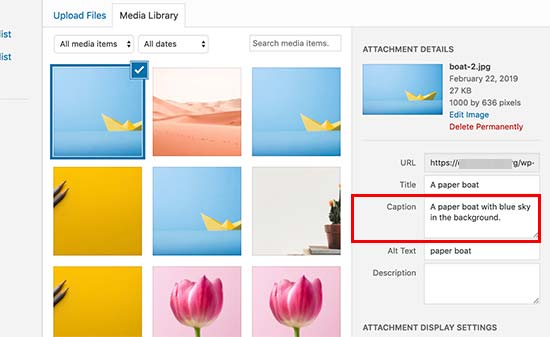
Click on the ‘Insert into post’ button to add the image to your post or page.
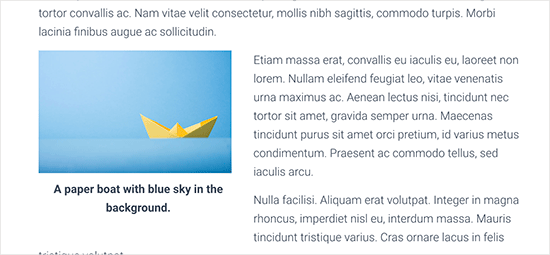
You will now be able to see the image preview in your post editor with the caption. You can save your changes and preview the post to see how it would look on your live site.
Adding Captions to Gallery Images in WordPress with Classic Editor
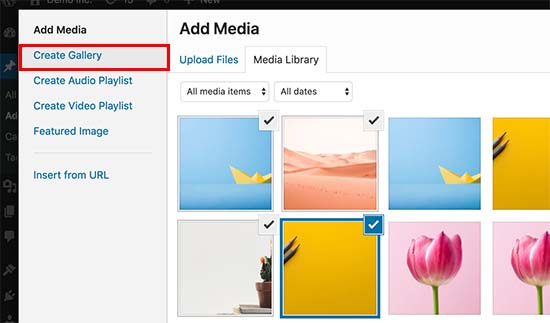
You can also add captions to images when creating a gallery using the Classic Editor. Simply upload and select multiple images and then click on the ‘Create gallery’ link from the left column.
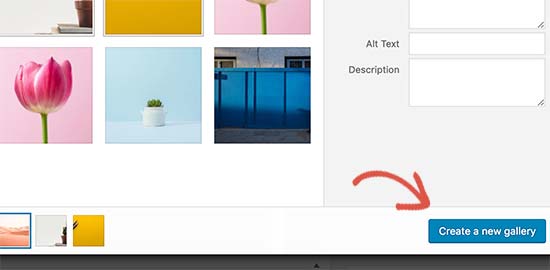
After that, you will need to click on the ‘Create a new gallery’ button at the bottom right corner of the popup.
Now you will be able to add captions directly below each image or click on an image to load its settings in the right column and then add the caption.
You can now click on the Insert Gallery button to add gallery into your WordPress post or page.
We hope this article helped you to add caption text to your images in WordPress. If you liked this article, you might also want to see our guide on how to fix common image issues in WordPress.
If you liked this article, then please subscribe to our YouTube Channel for WordPress video tutorials. You can also find us on Twitter and Facebook.
The post How to Add Caption to Images in WordPress appeared first on WPBeginner.
from WPBeginner https://ift.tt/2VkrWzF
via IFTTT
No comments:
Post a Comment