Do you want to add SVG files to your WordPress site? By default, WordPress allows you to upload all popular image, audio, and video file formats, but SVG is not among them. In this article, we will show you how to easily add SVG in WordPress.

What is SVG?
SVG or Scalable Vector Graphics is a file format that defines vector-graphics using the XML markup language. The main benefit of SVG is that it allows you to enlarge images without losing quality or having any pixelation.
How does SVG work?
Scalable Vector Graphics (SVG) is a technology that displays two-dimensional drawings using XML. They are different than the commonly used image formats like PNG, GIF, or JPEGs.
If you take a png / jpeg image file and zoom in, then you will notice that the image will start to blur and become pixelated.
![]()
Vector graphics don’t use pixels. Instead, they use a two-dimensional map that defines the graphic you are viewing. As you zoom in, the image doesn’t pixelate.

This enables you to enlarge vector graphics without losing quality. Most importanly, SVG images can be way smaller in filesize than JPEGs or PNG.
Vector graphics are commonly used for icons, icon fonts, website logos, and branding images. You may want to add SVG files in WordPress for your company logo, icons, or other graphics.
As cool as they sound, SVG files are still a bit unsafe. That’s why WordPress doesn’t support SVG file uploads by default.
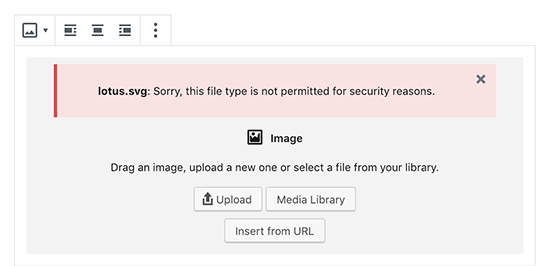
If you upload an SVG image in WordPress, then you will see the following error message:
Sorry, this file type is not permitted for security reasons.

Security Issues Concerning SVG in WordPress
SVG files contain code in the XML markup language which is similar to HTML. Your browser or SVG editing software parses the XML markup language to display the output on the screen.
However, this opens up your website to possible XML vulnerabilities. It can be used to gain unauthorized access to user data, trigger brute force attacks, or cross-site scripting attacks.
The methods we will share in this article will try to sanitize SVG files to improve their security. However, these plugins cannot totally prevent malicious code from being uploaded or injected.
The best solution is to only use SVG files that are created by reliable sources and to restrict SVG uploads to trusted users only.
To learn more about security, check out our complete WordPress security guide for beginners.
That being said, let’s take a look at how to easily and safely use SVG files in WordPress.
Method 1. Upload SVG Files in WordPress Using SVG Support
This method offers complete support for adding SVG files in WordPress. It also allows you to display inline SVG in WordPress posts and pages.
First, you need to install and activate the SVG Support plugin. For more details, see our step by step guide on how to install a WordPress plugin.
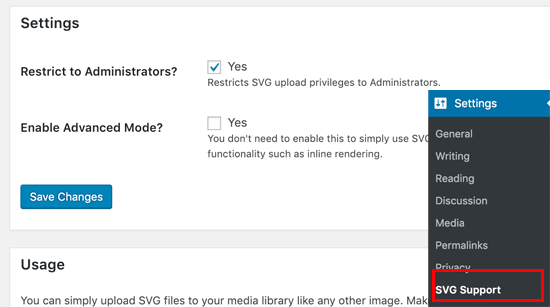
Upon activation, you need to visit Settings » SVG Support page to configure plugin settings.

On the settings page, you need to check the box next to ‘Restrict to Administrators?’ option. This will allow only a site administrator to upload SVG files in WordPress.
The next option is to turn on the advanced mode. You only need to check this option if you want to use advanced features like CSS animations and inline SVG rendering.
Don’t forget to click on the save changes button to store your settings.
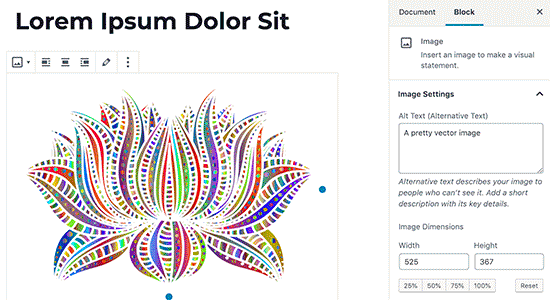
You can now create a new post or edit an existing one. In the post editor, you will upload your SVG file like you would upload any other image file. Simply add an image block to the editor and then upload the SVG file.
You will now be able to upload and embed SVG file in WordPress.

Method 2. Upload SVG Files in WordPress Using Safe SVG
This method also uses a plugin and allows you to perform sanitization of SVG files uploaded to WordPress.
The first thing you need to do is install and activate the Safe SVG plugin. For more details, see our step by step guide on how to install a WordPress plugin.
The plugin works out of the box, and there are no settings for you to configure. You can simply go ahead and start uploading SVG files.
The downside is that this plugin allows SVG uploads by all users who can write posts on your WordPress site.
In order to control who can upload files, you will need to purchase the premium version of the plugin.
We hope this article helped you learn how to safely add SVG in WordPress. You may also want to see our article on most common image issues in WordPress and how to fix them.
If you liked this article, then please subscribe to our YouTube Channel for WordPress video tutorials. You can also find us on Twitter and Facebook.
The post How to Add SVG in WordPress (with 2 Simple Solutions) appeared first on WPBeginner.
from WPBeginner http://bit.ly/2SjOqjl
via IFTTT
No comments:
Post a Comment