Do you want to add a client feedback form on your website? Client feedback is very helpful in improving your products and services. In this article, we will show you how to easily add a client feedback form in WordPress.

Why Do You Need a Client Feedback Form?
A client feedback form or a customer feedback form is a contact form that your customers can use to give direct feedback about your product or service.
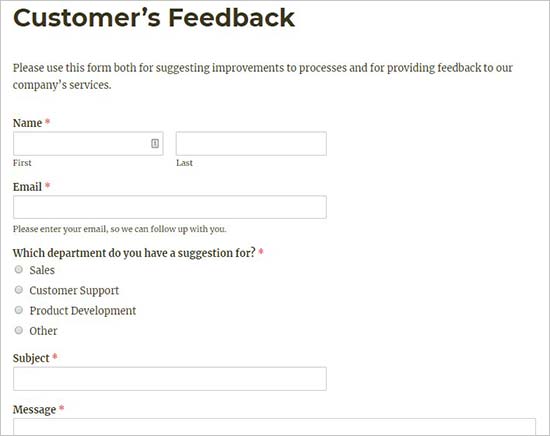
Basically, it helps you gain insight into how your clients evaluate your processes, services, products, and brand. You can then use this feedback to make improvements to your business and win even more customers.
Client feedback form is different than Net Promoter Score® (NPS) surveys which are a popular method of measuring customer loyalty.
That being said, let’s take a look at how to easily add a client feedback form in WordPress.
Step 1. Selecting the Best Feedback Form Plugin
The first thing you need to do is to select a WordPress feedback form plugin.
We recommend using WPForms, which is the best WordPress contact form plugin on the market.
WPForms drag & drop form builder makes it easy for anyone to create an online form (yes even the non-technical folks can use it). That’s why it’s being used on over 1 million websites now.
Since feedback forms are simple forms, you can use the free WPForms Lite plugin to build your form.
Now that you have chosen a plugin, the next step is to install it and start creating a client feedback form.
Step 2. Install a Feedback Form Plugin in WordPress
First thing you need to do is install and activate the WPForms plugin. For more details, see our step by step guide on how to install a WordPress plugin.
Upon activation, you need to visit WPForms » Add New page to create your feedback form.
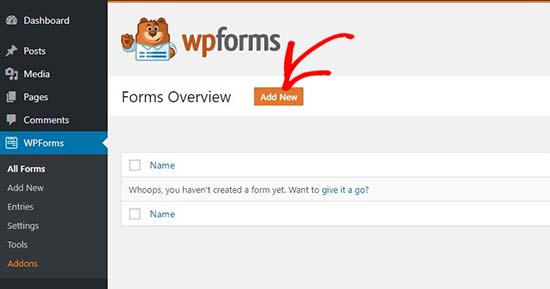
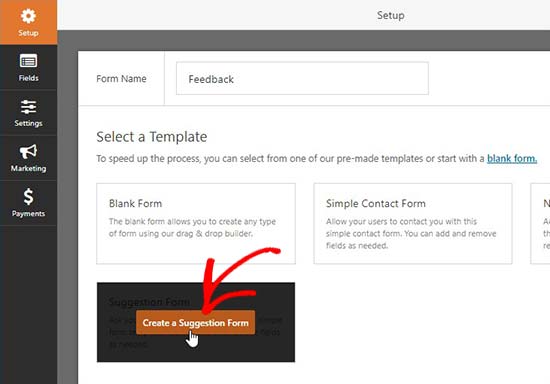
It will launch the WPForms form builder. Simply start by adding a name for your feedback form and then select the ‘Suggestion Form’ template.
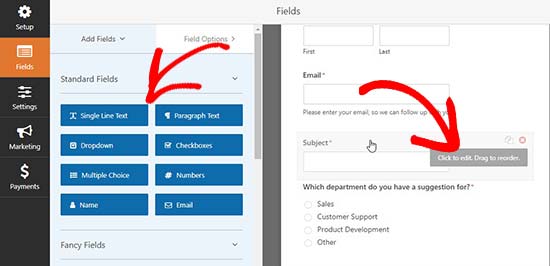
WPForms will now load the form template with basic feedback form fields already added to it. You can click on any field to edit it or drag & drop to change their order.
If you want to add a new field, then you can simply select it from the left side of the screen and drag it over.
Once you are done, click on the ‘Save’ button to store these settings.
Step 3. Configuring Form Notifications and Confirmation
After creating the feedback form in WordPress, the next step is to configure the form notifications and confirmation.
While confirmation is for the user, form notifications will be for you. You’ll receive an email when a client submits the feedback form on your website.
WPForms allows you to manage both of these settings and customize them as you want from the ‘Settings’ tab within WPForms builder.
First, you can edit the form confirmation settings. Simply go to ‘Confirmation’ tab and select a confirmation type from the dropdown to change the settings.
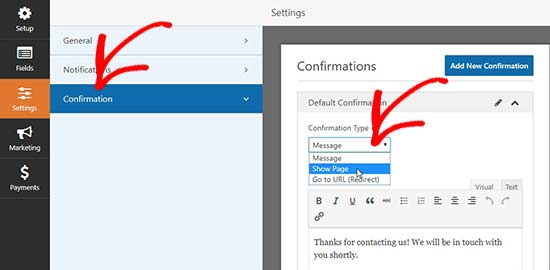
If you choose to display a thank you message, then there’s a pre-built message below the confirmation type section. You can change this message to add your own. You can also redirect users to a separate thank you page or a different URL from the confirmation type dropdown.
Next, you can go to the ‘Notifications’ tab. It has the default settings that are ideal for a feedback form and may not need any changes.
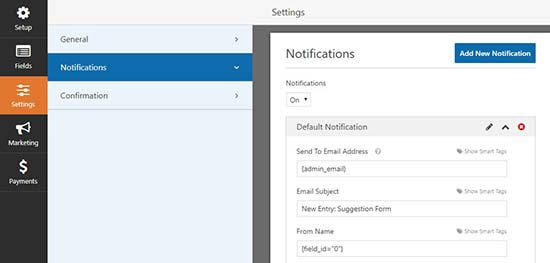
By default, it will send all the feedback form notifications to the admin email of your WordPress website. If you want to send the notifications to another email address, then you can simply add it in the notifications setting. You can also add comma separated emails to send notifications to multiple email addresses.
Step 4. Adding the Client Feedback Form to Your Website
Now your feedback form is ready, and you can add it to your WordPress website.
Simply edit a WordPress post or page where you want to add the form or create a new one.
On the post edit screen, you’ll notice the new ‘Add Form’ button above the text editor. Clicking on it will bring up a popup where you need to select the feedback form you created earlier.
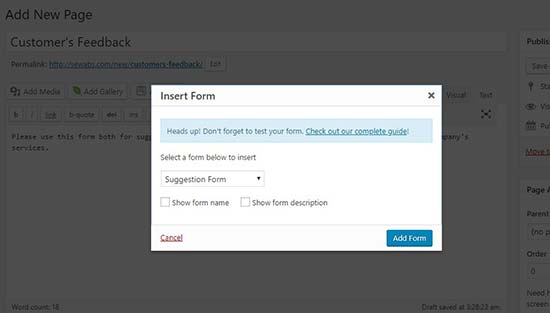
When you click on the Add Form button in the popup, it will add the feedback form shortcode to the post editor. You can go ahead and save or publish your post / page.
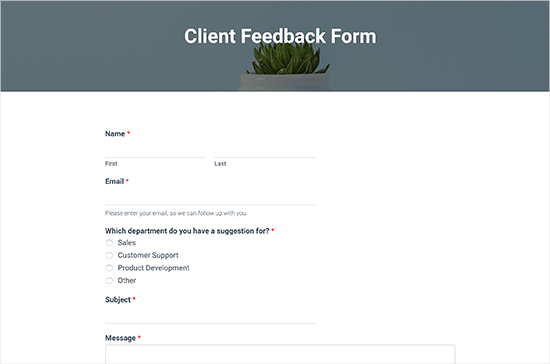
Next, you can visit your website to see the client feedback form in action.
Step 5 (Optional). Adding Client Feedback Form in the Sidebar
WPForms comes with a widget that you can use to add your client feedback form in the sidebar or any other widget area in WordPress.
You need to go to Appearance » Widgets page in your WordPress admin area. On this page, you can drag and drop the WPForms widget in the sidebar widget area.
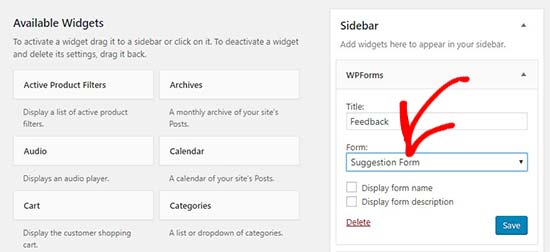
Simply add a title for the feedback form widget and select your form to show it in the sidebar. Make sure to click on the ‘Save’ button.
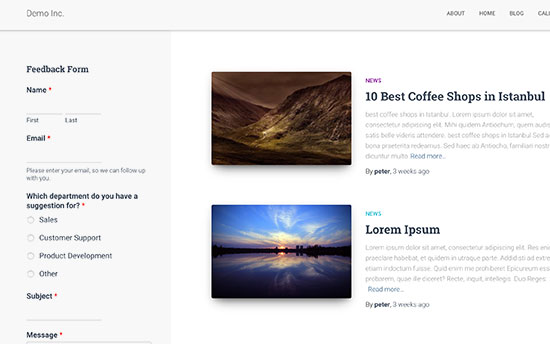
You can now visit your website to see your client feedback form displayed in a sidebar widget.
We hope this article helped you learn how to easily add a client feedback form in WordPress. You may also want to see our guide on how to create a donation form or how to create a survey in WordPress.
If you liked this article, then please subscribe to our YouTube Channel for WordPress video tutorials. You can also find us on Twitter and Facebook.
The post How to Easily Add a Client Feedback Form in WordPress (Step by Step) appeared first on WPBeginner.
from WPBeginner https://ift.tt/2DeoAcn
via IFTTT
No comments:
Post a Comment