Amazon UK

Friday, 31 August 2018

4 Tips for Photographing Fog to Create Mystical Images

There’s nothing that I’ve seen so far that compares to the ethereal and mystical beauty of capturing long exposure and photographing fog. There’s something so compelling about the soft silky texture that results from it. So much so, that photographers all over the world are constantly chasing it.

4 Tips for Photographing Fog

In fact, where I live in the Bay Area, we call these people “fog-chasers,” and they spend their days in popular local spots waiting for it to make an appearance just so that they capture this mystical geological phenomenon. The fog can create mystique and drama. It can add mood, be a soft blanket over a scene, a floor, or a wall. It can take many forms in shapes and create some very compelling photographs.

The main challenges in capturing these fog shots are:

  • Focus issues for getting a sharp image.
  • Preventing camera shake.
  • Preparing for the shot.

4 Tips for Photographing Fog

Tip 1 – Finding the fog

This is the most challenging aspect of doing this type of shot since as a photographer you, unfortunately, have no control over the weather. So, what I do is scour the web for weather sites that can provide me with the information I need.

I also check out the weather on the local news religiously as well as follow weathermen on Twitter and Facebook. Once the word is out that fog is on its way, webcams are the best way to monitor it on the day you want to shoot. You can see what the fog looks like and if it’ll be cooperative for the type of shot you have in mind.

4 Tips for Photographing Fog

Tip 2 – Composition

Fog, in general, has a way of turning an ordinary scene into something spectacular. For fog waves, wide landscapes with forest treetops make an interesting subject. So do iconic structures or monuments.

4 Tips for Photographing Fog

Here in San Francisco, the Golden Gate Bridge is a local favorite. At certain times during the year, the fog gets so low that it flows beneath the arches. It serves as the perfect opportunity to cream a soft blanket from these types of long exposures.

Another local favorite is Mount Tamalpais, which consists of long ranges of hills adorned with redwood trees. The way the fog flows over the treetops creates these spectacular waves as it flows through the peak’s ridges.

4 Tips for Photographing Fog - Golden Gate bridge in the fog

Tip 3 – Use an ND Filter

Neutral Density filters are an absolute necessity for smoothing out fog and making it appear almost silk-like. The time of day will dictate the density of the filter needed. If it’s bright daylight out you’ll need something quite dark while if you’re shooting at twilight you’ll need something lighter or you may not need a filter at all.

When using an ND filter, make sure to first set up your shot using autofocus, without the filter. Then set the camera to manual focus and add the filter. This way you’ll assure the proper focus for your shot. Alternatively, you can also use back button focus.

4 Tips for Photographing Fog

Most of the time if the filter is too dark the camera will not be able to focus on a specific focal point. Also, because fog is a moving entity and puts a veil on any element in your composition the camera’s autofocus will most likely fail. Fear not and simply find something in the frame that’s sharp enough to focus on, then lock focus on that spot.

Tip 4 – Experiment with shutter speed

There are two types of fog shots that be taken from the techniques above that will produce different results based on your shutter speed.

4 Tips for Photographing Fog

A shorter shutter speed will give the fog more texture while a longer exposure will make it look silkier and smoother. You’ll need to experiment to see what looks better to you. Sometimes keeping the shutter open too long will result in the fog looking too messy and it could lose its lines and consistency.

Conclusion

Hopefully, these tips are helpful and will inspire you to get out there and experiment photography fog. The most difficult aspect of this type of photography is first finding it, then capturing it in a way that’ll showcase it as well as the scene it should be complementing.

4 Tips for Photographing Fog

In order to achieve this ND filters will help you soften the fog flow and turn it into waves. After that experimenting with shutter speeds will create various results.

In the end, it’s your aesthetic as the photographer that will dictate what is most pleasing to you. I hope that the photos that I’ve captured from the years of shooting the fog will inspire and get you on your way to becoming a fog chaser too!

4 Tips for Photographing Fog

The post 4 Tips for Photographing Fog to Create Mystical Images appeared first on Digital Photography School.


from Digital Photography School https://ift.tt/2LHWXs6
via IFTTT

5 Things I Wish I’d Known Before Starting Nature Photography

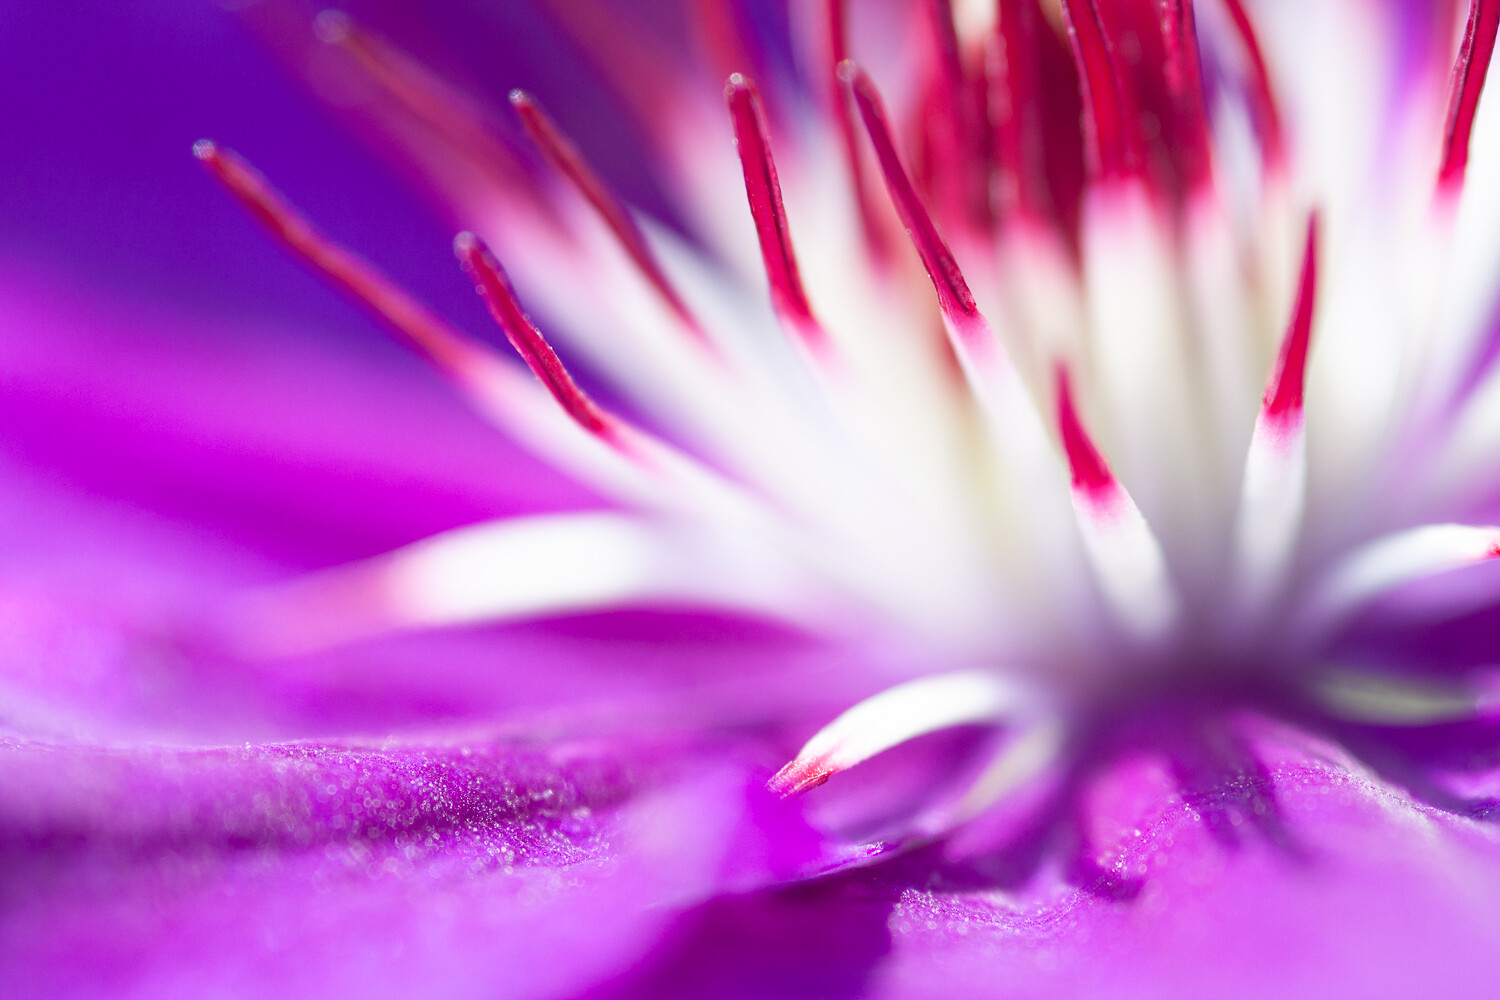
5 Things I Wish I'd Known Before Starting Nature Photography - rose macro

How do you, as a beginning nature photographer, go about improving? How do you ensure that you gain useful skills as rapidly as possible so that you can start shooting professional quality nature photography?

5 Things I Wish I'd Known Before Starting Nature Photography - flower macro pink

In reality, it’s often difficult for the beginner to recognize how they should learn nature photography.

But I myself am a nature photographer, and looking back the answers to these questions are clear. So I thought I’d make a tutorial that discusses several things I wish I had known at the beginning of my nature photography journey.

Read on. The sooner you know these things, the sooner you’ll begin to take consistently stunning images.

1. Photograph every day

The first thing I wish I had known when starting nature photography is extremely simple,

Photograph every day!

I cannot emphasize this enough.

5 Things I Wish I'd Known Before Starting Nature Photography - flower close up

If you’re truly serious about improving as a nature photographer, you should try to take at least one photograph of nature, every single day. It doesn’t matter if you take it with your DSLR or your iPhone. Just get out and shoot.

You’ve likely heard that practice makes perfect, and this is part of that. But there’s more to it. By photographing every day, you’ll ensure that your artistic eye remains strong.

5 Things I Wish I'd Known Before Starting Nature Photography - yellow flower poppy

What do I mean by that? If you photograph every day, thinking about light, color, and composition will become second nature. You’ll start to see photographic opportunities everywhere.

This is exactly where you want to be as a nature photographer.

2. View the type of photography you want to create

extraordinary-photographs-ordinary-subjects

This is a huge one, as well. If you want to create great nature photography, you have to view great nature photography.

When you view amazing photography, you develop an eye for light, color, and composition without even realizing it.

nature-photography-flower-macro nature-photography-flower-macro

This is an essential skill for a budding nature photographer. Plus, there’s an added bonus – it’s really fun!

Start by looking up the type of photographs that you’d like to create. You can use a well-organized site like 500PX. Or you can just use Google. The important thing is that you find photography to look at for inspiration.

For instance, if you’re an up-and-coming macro photographer, try viewing the portfolios of photographers such as Mike Moats and Kristel Schneider.

If you’re a beginning landscape photographer, look at the work of Ian Plant and Thomas Heaton.

If you’re a budding wildlife photographer, look to photographers such as Marsel Van Oosten and Matthew Studebaker.

5 Things I Wish I'd Known Before Starting Nature Photography - flower extreme close up

Then expand from there.

The purpose isn’t to memorize their images so that you can copy them in the field. Rather, the goal is to appreciate great imagery, while recognizing (if only subconsciously) what makes it great.

The goal is also to get inspired.

3. Light matters more than you think

I’ve emphasized the need to practice photography every day, and that truly is essential. However, when practicing, there’s something extremely important you need to consider. That is the light.

I’ll state it plainly. Photograph the two hours after sunrise, the two hours before sunset, and during midday only if it’s cloudy.

Otherwise, stay indoors.

extraordinary-photographs-ordinary-subjects nature-photography-flower-macro

This generally takes some retraining of the brain. It’s easy to think to yourself, “It’s such a nice sunny afternoon; I should get out and photograph!”

But you need to resist this thought. Because photographing during a sunny afternoon will result in harsh, contrasty images that are almost never desirable in nature photography.

Start spending time observing the quality of the light. Notice how nicely illuminated your subject is when the sun is low in the sky. Notice how lovely and soft the light is on a cloudy afternoon. Notice how harsh the light is under the midday sun.

nature-photography-flower-macro extraordinary-photographs-ordinary-subjects

As a beginning photographer, I often forgot about this rule. So my photographs paid the price. I have thousands upon thousands of photographs that are simply unusable because of the harsh sunlight.

Memorize the rule. You may not be able to see such a difference in your images at present. But in a few years, you’ll thank me!

4. Gear matters less than you think

While light is more important than you think, gear is also less important than you may imagine.

You might think that gear is essential. You may ask me, “Jaymes, if my gear really isn’t important, then why do you spend so much time reading gear reviews and upgrading your equipment?”

But my response is this: gear does matter. High-quality lenses will allow you to capture the detail on a singing bird or the movement of sparring polar bears.

5 Things I Wish I'd Known Before Starting Nature Photography - flower extreme close up - daisy

High-quality cameras will allow you to photograph a wolf under the cover of twilight or a hawk flying directly above.

Yet gear is nothing without the photographers that wield it. A good photographer can get stunning images with any equipment. Whereas a bad photographer cannot create stunning images, regardless of their gear.

extraordinary-photographs-ordinary-subjects nature-photography-flower-macro

So focus less on making sure you have the right equipment. Instead, practice using the equipment you do have. Try to eke out as much as you can from it.

Eventually, if you work hard enough, you will get beautiful images, high-quality gear or not.

5. Most of the images you take will be terrible

Beginning nature photographers often have a dangerous misconception about nature photography. That is that the best photographers rarely take bad images.

This belief can lead to discouragement on the part of the budding photographer.

5 Things I Wish I'd Known Before Starting Nature Photography - flower extreme close up abstract

This type of abstract photograph comes amid a huge number of deleted images.

After looking through your memory card, to find that only you’ve managed to nail a single image (out of a hundred!), you may want to give up.

Don’t.

Why?

Because most of the early images you take will be terrible, and that’s okay. This is true for nature photographers of all levels. Of course, at the higher levels, the nature photographer’s standards are higher, but the tip still applies.

5 Things I Wish I'd Known Before Starting Nature Photography - flower extreme close up

This is true for me, as well.

I go on dozens of photo shoots each month and take around 600 images per shoot. Yet I’m happy if I get a single image with which I’m really pleased.

Because uncertainty, guesswork, and reaction are part of the game. This is the nature of nature photography.

So let me reiterate. Don’t get discouraged. Most of your shots will be terrible, but it’s the good ones that count.

5 Things I Wish I'd Known Before Starting Nature Photography - flower extreme close up tulip

In Conclusion

Starting nature photography can be daunting for a lot of people. It can be difficult to know how to improve. You want to take stunning images as soon as possible, but you just can’t figure out how.

5 Things I Wish I'd Known Before Starting Nature Photography - flower extreme close up

By understanding the lessons above, you’ll be well on your way to creating beautiful nature images.

Just remember:

  • Shoot every day.
  • View the type of photography you want to create.
  • Light matters more.
  • Gear matters less.
  • Finally, don’t be discouraged if most of your images are terrible.

nature-photography-flower-macro

Someday soon, you’ll be a great nature photographer.

What are some things you wish you had known when first starting out as a nature photographer? Let me know in the comments area below.

nature-photography-flower-macro

The post 5 Things I Wish I’d Known Before Starting Nature Photography appeared first on Digital Photography School.


from Digital Photography School https://ift.tt/2LFdgWL
via IFTTT

Tips for Posing Large Families and Groups

Portrait sessions can vary in many ways, one being the size of the group you are photographing. Don’t be afraid, these tips for posing large families and groups will help you to create the perfect large group portrait no matter the location or the number of people.

Tips for Posing Large Families and Groups - family posed on the grass

What is considered a large group?

Large group portraits typically begin with six or more people. Large groups can include children or be made up of adults, it all depends on the type of session you are photographing.

It can also reach up to 20 people, especially if you are photographing a bridal party or a family with smaller family units all mixed together.

Tips for Posing Large Families and Groups - large family in front of trees

Posing rule for any type of grouping

The most useful posing rule for large groups is to use the triangle method.

This is where you pose people, either standing or sitting, or a mixture of both, and if you draw imaginary lines connecting their heads, they would create triangles. This method is the best so that you don’t pose people’s heads one on top of another (totem pole-like), creating an awkward photograph.

Tips for Posing Large Families and Groups - use triangles in posing

Use the triangle method to pose large groups.

This method works for any type of grouping with three or more people. However, for large groups of 10 or more, this posing rule is perfect so that everyone in the photo can be seen. It ensures nobody’s head is directly behind another person’s.

Large Families

Large families can range from nuclear families where there are more than five people or extended portraits where more than one nuclear family is going to be in the portrait.

Tips for Posing Large Families and Groups - family of 5 with young kids

The key is to pose the families in different combinations in the same spot so that you can offer your client more poses without having to move them too much.

Always pose the parents in the middle and then pose the rest of the family out from there. The parents are a great focal point in any portrait and from there, you can lead the eyes to the children or other families.

Tips for Posing Large Families and Groups - family in white and jeans

For example, for a portrait of a family of five, begin by placing the parents in the center of your photo first. Then, pose the taller children next to each parent. Smaller children can be put between the taller child and parent, creating the triangle.

Afterward, you can seat the family in the same order as when they were standing. If there are really small children, they can stand and hug another family member from behind. Be mindful of where their heads are positioned so that you create triangles and can see each family member in the portrait.

Tips for Posing Large Families and Groups - family standing and sitting

Pose the family sitting or standing.

In the same spot, you can then have the family stand up and separate a little. This gives them a little more space but still keeps them at arm’s length. Ask them to interact with each other in between posing for the camera.

Don’t forget the triangles in this pose as well! It can look a little off if you pose two family members who are the same height together. Try and move the family members from one side to the other to create more variety.

Tips for Posing Large Families and Groups - extended family standing

Give the family some space while posing them standing.

For larger families, walking is a good way to get more natural photos of everyone. Pose nuclear families together.

For example, if you have a family of 16 with grandparents, pose the grandparents in the center, then group the families on either side keeping the children with their parents.

Tips for Posing Large Families and Groups - extended family on the beach

Keep in mind that if it looks a little awkward, it probably will look that way in the photo as well. Taking more time and moving people around will ensure that you get the right posing even before taking the photograph.

Lastly, try posing some people away from the center to give the photo more depth. Facing everyone toward the center is a good starting point. However, with large groups, it’s best to try different poses so that you can offer your clients an assortment of different options.

Connect People

There is nothing more awkward than people standing together with their arms at their sides. With families, especially large groups, try and have your clients connect with each other.

You can do this by grouping the main people (the parents or grandparents) in the center facing each other hugging, and then group smaller families where each family member is touching another person. This shows connection within small family units in the large family photo and shows warmth.

Tips for Posing Large Families and Groups - family hugging b/w

Resting hands on shoulders, holding hands, hugging and tucking fingers behind, resting a hand on someone’s arm, or having someone lean on another’s shoulders are all good examples of connection.

Connecting people in a photo also gets rid of this most often heard question, “What do I do with my hands?”

Tips for Posing Large Families and Groups - family with 4 kids

For the people that you pose on the edges of the family portrait, be mindful that they look in toward the center so that they don’t seem out of place. If they are male and there are no children present, have them put one hand in their pocket. If they are female, make sure they aren’t standing too short or they will look out of place.

Chairs and Stools

If you are photographing at a venue, say a wedding reception, you may have the chance to use chairs or stools for posing.

In this case, try and place them throughout the photo so that they don’t line up perfectly. You’ll want to space them out according to the number of people in the portrait, always keeping in mind the triangle rule.

Tips for Posing Large Families and Groups - family photo

Chairs tend to work better than stools because the stool height can create really big valleys in your triangle posing if the person is too tall or too short in relation to those around them in the portrait.

Natural Posing

Once you have taken the best-posed portraits of the large group, have them loosen up a bit by asking them to do a group huddle or squeeze. This will get some laughs out of your clients and allow them to let their posed bodies rest for a bit.

Tips for Posing Large Families and Groups - family hugging

Asking the family to take a break can offer some great natural posing. This man had his whole family together after many years and was overcome by joy.

Ask your group to walk around, talk to each other, and just be. Look out for the children in particular, as they’ll usually act the most natural.

This collection of natural posing will often make for the most emotive portraits because they will portray the family just as they are. Even better if they are in a location that is fun or open where they can enjoy a walk or play games.

Photograph Family Units Separately

When you photograph families with grandparents or more than one family unit, make sure to photograph each family separately and together. Pose each family together in the larger portrait first, then, if you have time, mix them up a bit and have some fun.

Tips for Posing Large Families and Groups

Ask them to play, run, walk, do a group hug, or anything that will create authentic smiles and expressions from the oldest to the youngest.

Tips for Posing Large Families and Groups - individual portraits

Take time to get portraits of the adults as well. Either in couples or individually.

This also helps to break up a session with little children because they can get bored quickly.

Tips for Posing Large Families and Groups - individual photos of kids

Photograph children individually.

Try different combinations with the families, for example:

  • Grandparents with the grandchildren
  • Grandchildren together
  • All of the children of the parents together with and without the parents
  • Each couple in the family alone
  • Individuals portraits of each child
  • All the men together
  • All the women together
  • Generational photos
  • Cousins together
  • Brothers and sisters with and without in-laws
  • Each grandparent alone and together

Tips for Posing Large Families and Groups - different group posing options

Not all of those may apply to each large family portrait, but they can help you to add to the collection of poses that you’ll deliver to your clients.

Tips for Posing Large Families and Groups - family and kids photos

Take photos of the whole family together and then take photos of just the children.

Tips for Posing Large Families and Groups - 4 generations photo

Make sure to get generational photographs like this one of the 4 generations of men in the family.

Wrapping up

Before you wrap up the session, ask your clients if there is any portrait or pose that they specifically want. Some large families may bring a prop for everyone to use like shirts. There may also be a combination that you missed or didn’t think of that they would like to get.

Tips for Posing Large Families and Groups

Asking, “Is there anything else you’d like me to photograph before we leave?” can also be a great way to end the session once you feel you have gotten all of the best photos.

Giving your clients the chance to make sure they get all of the portraits they want is key for you to do a complete job with their photographs.

In conclusion

Posing large families can seem like a big challenge, however, using the triangle posing method can help tremendously in getting different combinations and poses. This will give your clients an assortment of poses and keep the whole experience fun and light which will make them want to get more portraits taken in the future!

The post Tips for Posing Large Families and Groups appeared first on Digital Photography School.


from Digital Photography School https://ift.tt/2C7Pt2i
via IFTTT

8 Tips to Help Find the Subject for Your Composition

Do you find it difficult to take photos which hold people’s attention? In our digital societies where image sharing is prolific, it is challenging to have people really take time to look at your prized photos. Image composition is key here.

So I want to give you eight tips on how to create pictures that will grab hold your viewer’s attention. People will want to stop and look rather than keep scrolling past your images.

Mask at a Chiang Mai Market - 8 Tips to Help Find the Subject for Your Composition

A good composition should have a clear main subject. It might be as plain as a landscape or a person’s face, or it might be something very small in the frame. If the composition is good the main subject will stand out like a sore thumb.

We all have a unique view of the world. Each of us takes in the world around us in different ways. If you have ever been on a group photo walk and taken part in a shared image review afterward, you will know this. Each photographer will have walked the same street, and the number of photographers that participated, there will be that same variety of pictures.

girl with Kayan Neck Rings - 8 Tips to Help Find the Subject for Your Composition

1. Choose a subject you can relate to

What catches your eye? Why does it appeal to you? You should be asking yourself these things when you are taking pictures. If you choose subjects that you feel a connection with you will create more interesting photos. This is simply because you are interested in the subject yourself.

So your initial choice of subject should be something that you can connect with. My subject of the portrait below is a woman my wife and I chat with at the local market. We connect with her. I wrote about her and her late husband in a recent article.

Because I have this lovely friendship with her it is easier for me to make lovely pictures of her. I know she will happily pose for me. I also know I will get a more interesting photo of her when she is that bit more relaxed and not looking directly at me. In this photo, she was chatting with my wife who was standing beside me.

Sticky Rice Vendor - 8 Tips to Help Find the Subject for Your Composition

2. Isolate the subject

About the most obvious way to have your main subject stand out in your photos is to isolate it.

My favorite two ways to isolate my subject is to use a narrow depth of field or a dark background. By using either of these techniques your main subject will be unmistakable.

Choosing a wide enough aperture and having your subject far enough from the background will allow you to have your background blurred and your subject sharp. If you are using a camera with a small sensor or a smartphone with only one lens, this may not be possible.

When you have a dark background your subject will stand out, especially when there is more light on the subject than the background. To achieve this look find a spot where the background is in the shade and your subject has more light on it/them.

Kayaw portrait - composition

3. Choose your lens carefully

Your choice of lens can affect how you compose the image and how your main subject will be seen. Sometimes a wide-angle lens is better than a telephoto. Other times you will need a longer lens.

Getting close to your subject with a wide lens has a different effect than if you use a long lens and position yourself further away. If you are not sure about how this works the best way to learn is to experiment.

Try taking a series of photos of the same subject with various lenses or zoom settings and see in which photos your main subject looks the best.

Chaing Mai Fresh Market Vendor - composition

4. Frame your subject

Set up your subject how you want to see them. Move around your subject and study them from different angles. Watch closely how the background changes in relation to what’s behind them. Find an angle where your subject looks best.

Limit what you include in your frame. Fill your frame only with what is relevant to the photo you are making. If you can see anything in the frame which does not balance with or enhance your subject keep making changes until you can no longer see those things.

5. Exploit the foreground

Make use of something in the foreground of your composition to draw the viewer’s eye to your subject. This technique will add depth to your composition.

Use an object which is in front of your main subject, either in focus or out of focus. This can help bring the viewer’s eye to concentrate more on your subject.

Kayaw Ethnic Minority Girl by Kevin Landwer-Johan

6. Use leading lines and diagonals

Composing your photo so there are strong lines leading to your main subject will enhance it. The viewer’s eye will be lead along the lines to rest on your chosen subject. This is a very simple, very effective technique.

Diagonal lines used well in a composition can also be used to draw the viewer’s eye to the main subject.

7. Time it well

Choosing the right time to take your photo can help to bring attention to your main subject. When you are photographing in a busy location good timing is imperative. Having someone walk in front or behind your main subject just as you take your photo would detract from your main subject.

Watch carefully. When I am in a busy place I usually have both eyes open, rather than closing one. This way I can see more of what is happening around me and my subject and it helps me time my photos better.

Bust Chiang Mai Market by Kevin Landwer-Johan

8. Crop imaginatively

Don’t always stick to the rules of composition. Stepping outside the box can help highlight your main subject in unusual ways.

In this photo of the gold elephant statue against the gold wall of the chedi, everything tended to blend together. The harsh light was not helpful. Cropping tight to the elephant and only including half of it draws your attention there. The negative space balances the composition.

Temple Gold Elephant by Kevin Landwer-Johan

Conclusion

Try these tips sometimes. Be mindful of your main subject and whatever else is in your frame. If there are distractions, use one or more of these techniques to draw attention to your main subject and have it tell the story you want.

Having your primary subject stand out will make your photo easy for people to look at and relate to. But more than just having your subject stand out, you need to frame it so that it lets viewers see the subject and scene how you see it.

The post 8 Tips to Help Find the Subject for Your Composition appeared first on Digital Photography School.


from Digital Photography School https://ift.tt/2NrwBw1
via IFTTT

CPA Cash Machine